Google Analytics Integration
Getting credentials
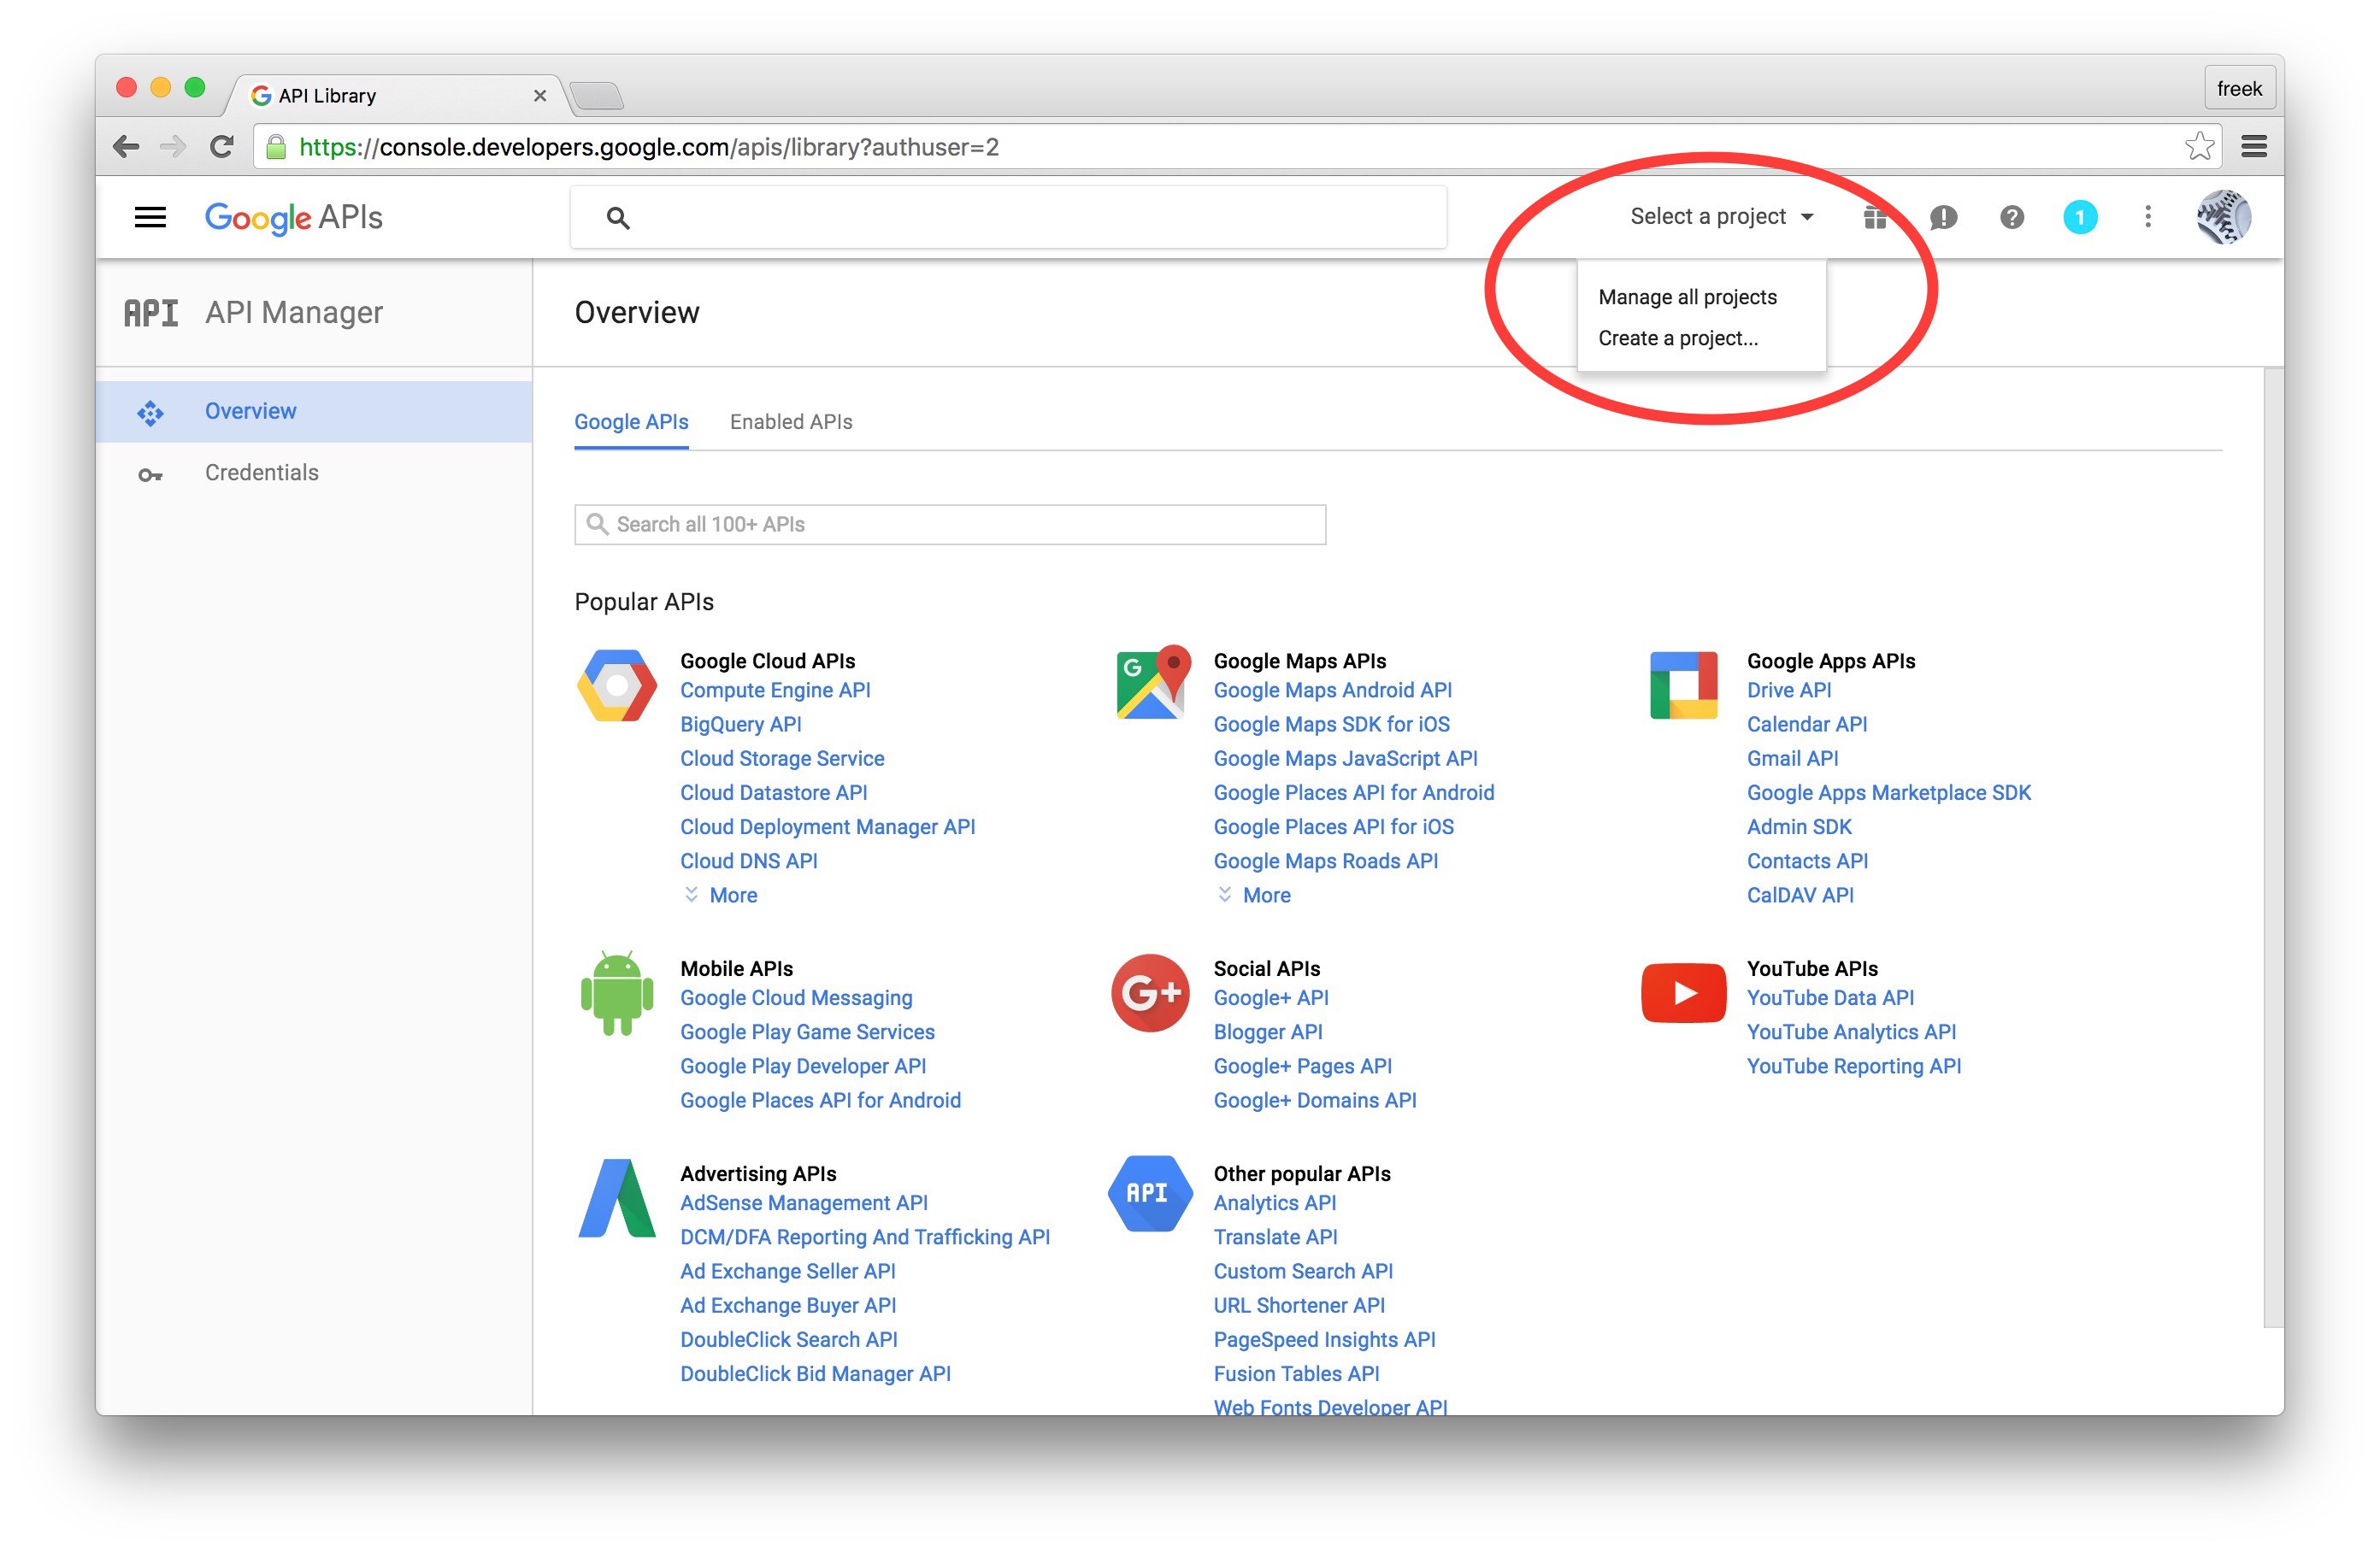
The first thing you’ll need to do is to get some credentials to use Google API’s. I’m assuming that you’ve already created a Google account and are signed in. Head over to Google API’s site and click “Select a project” in the header.
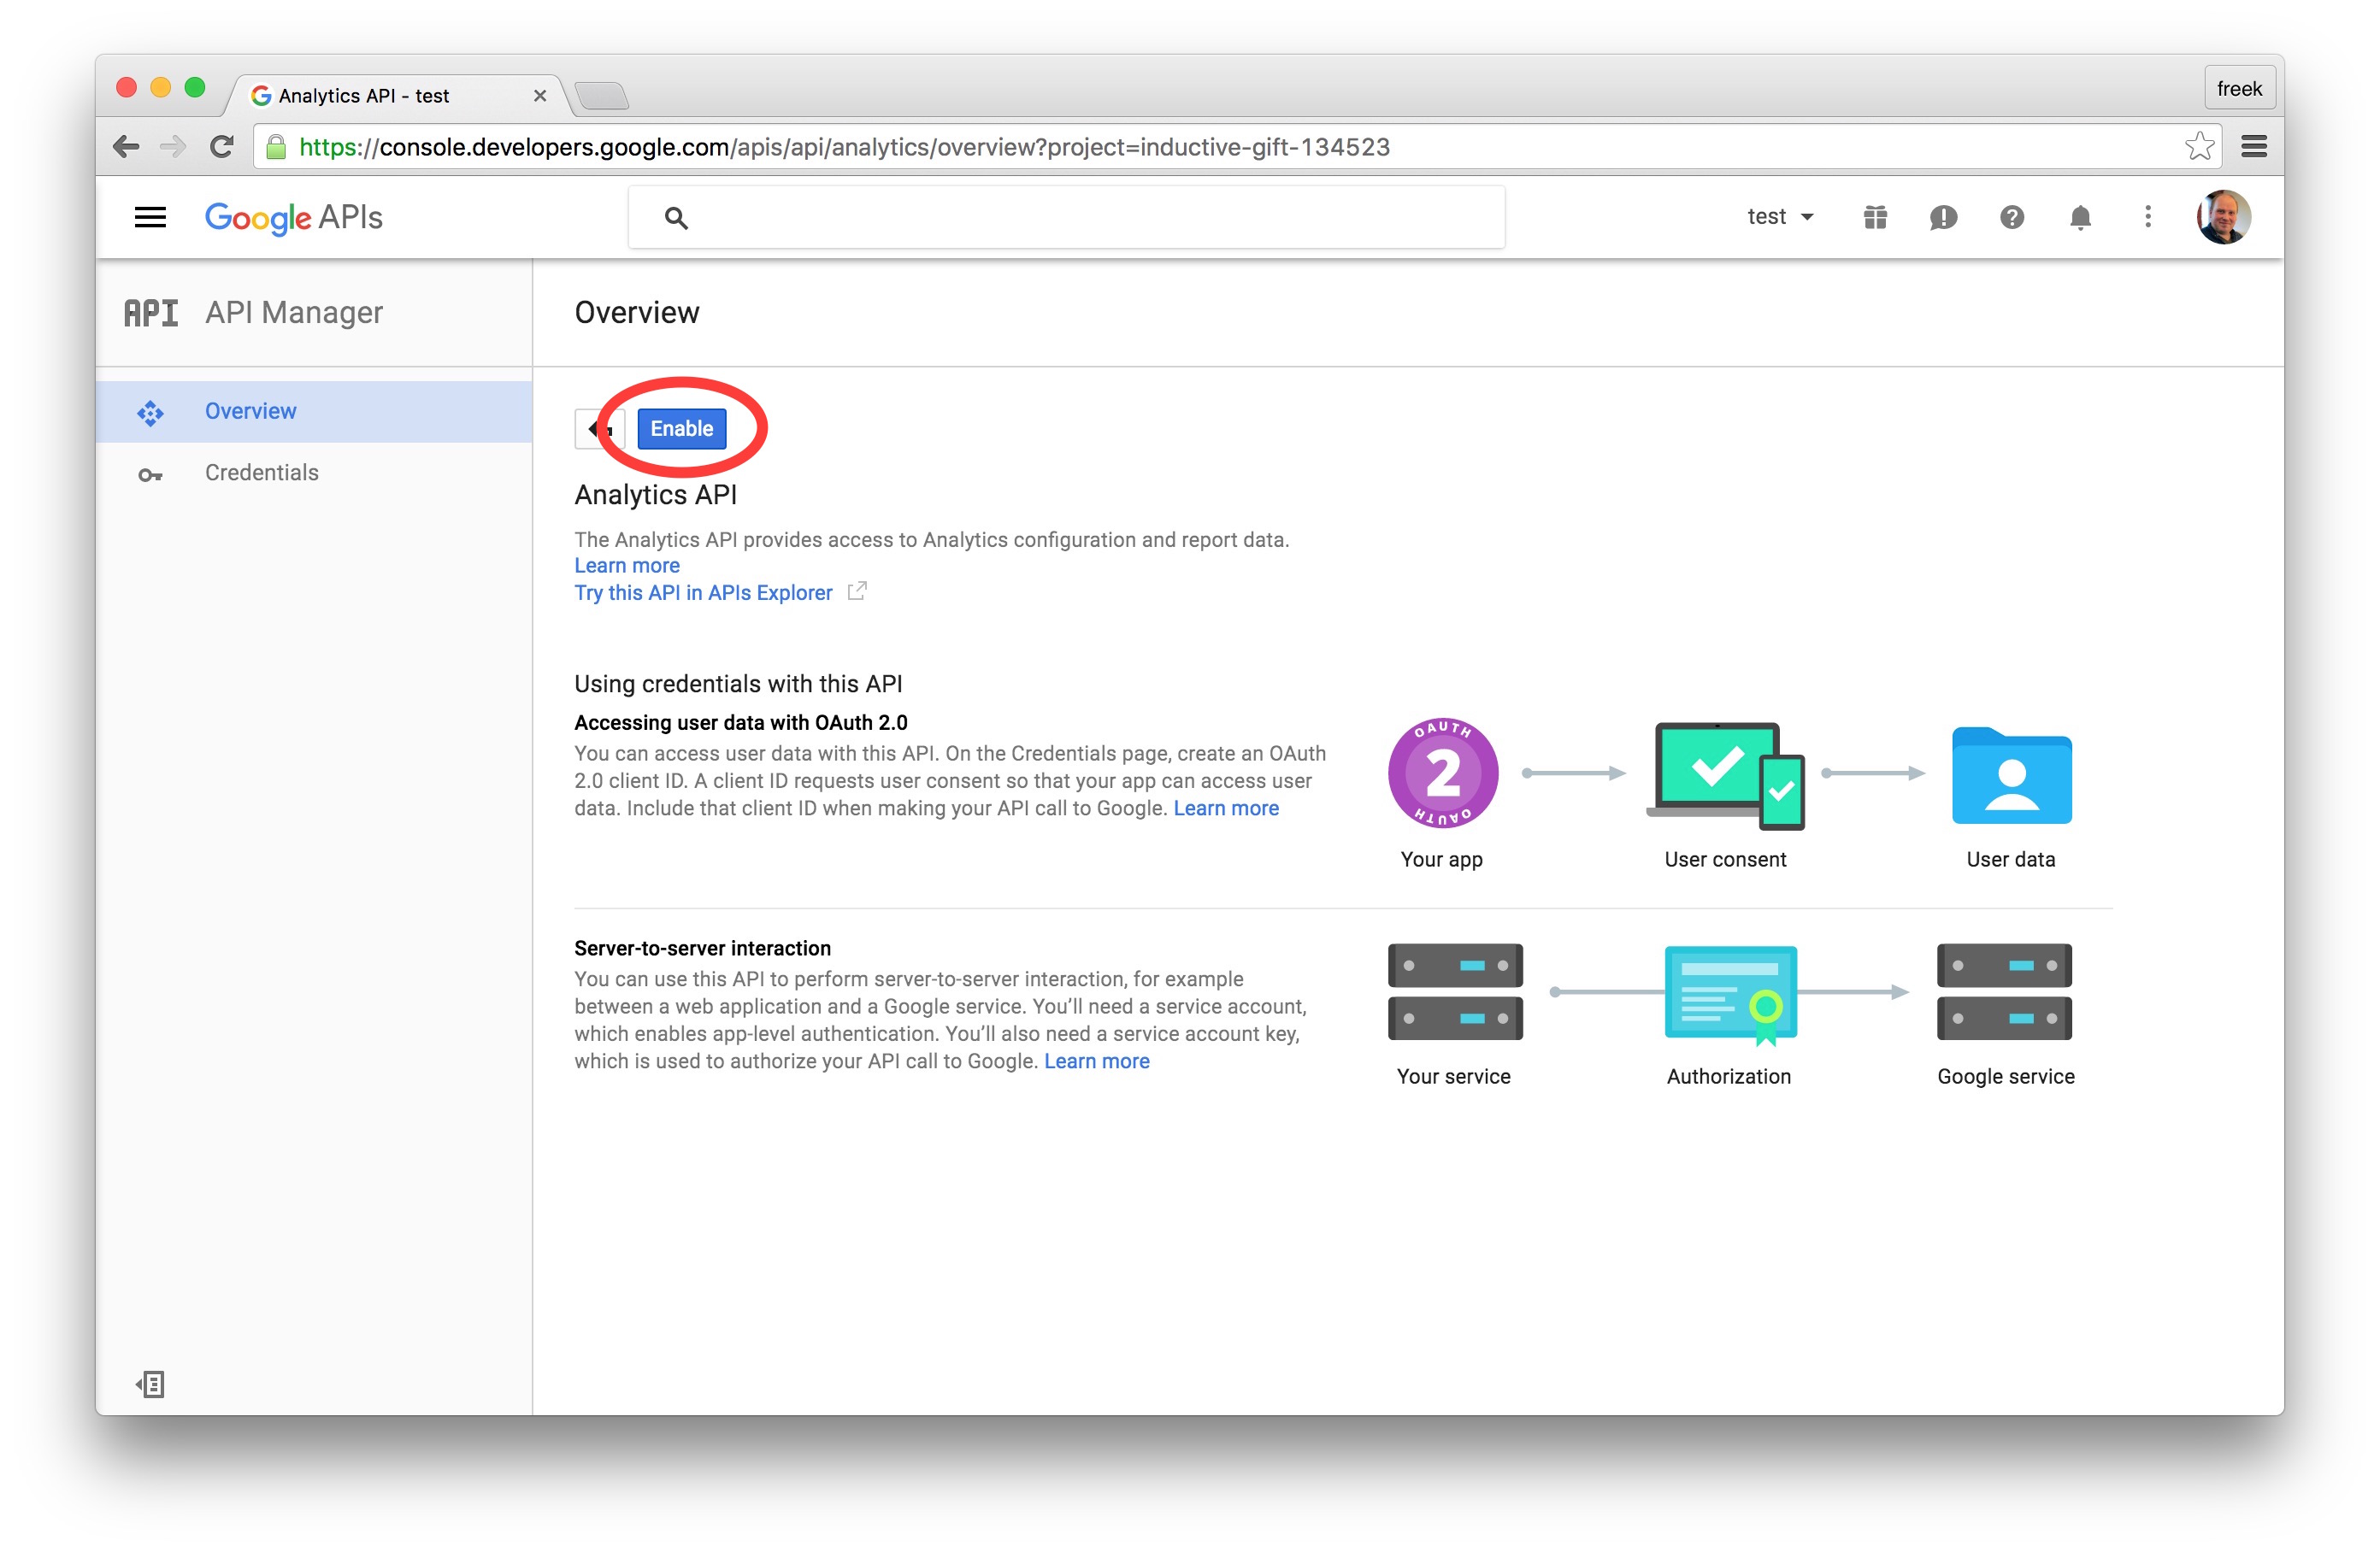
Next up we must specify which API’s the project may consume. In the list of available API’s click “Google Analytics API”. On the next screen click “Enable”.
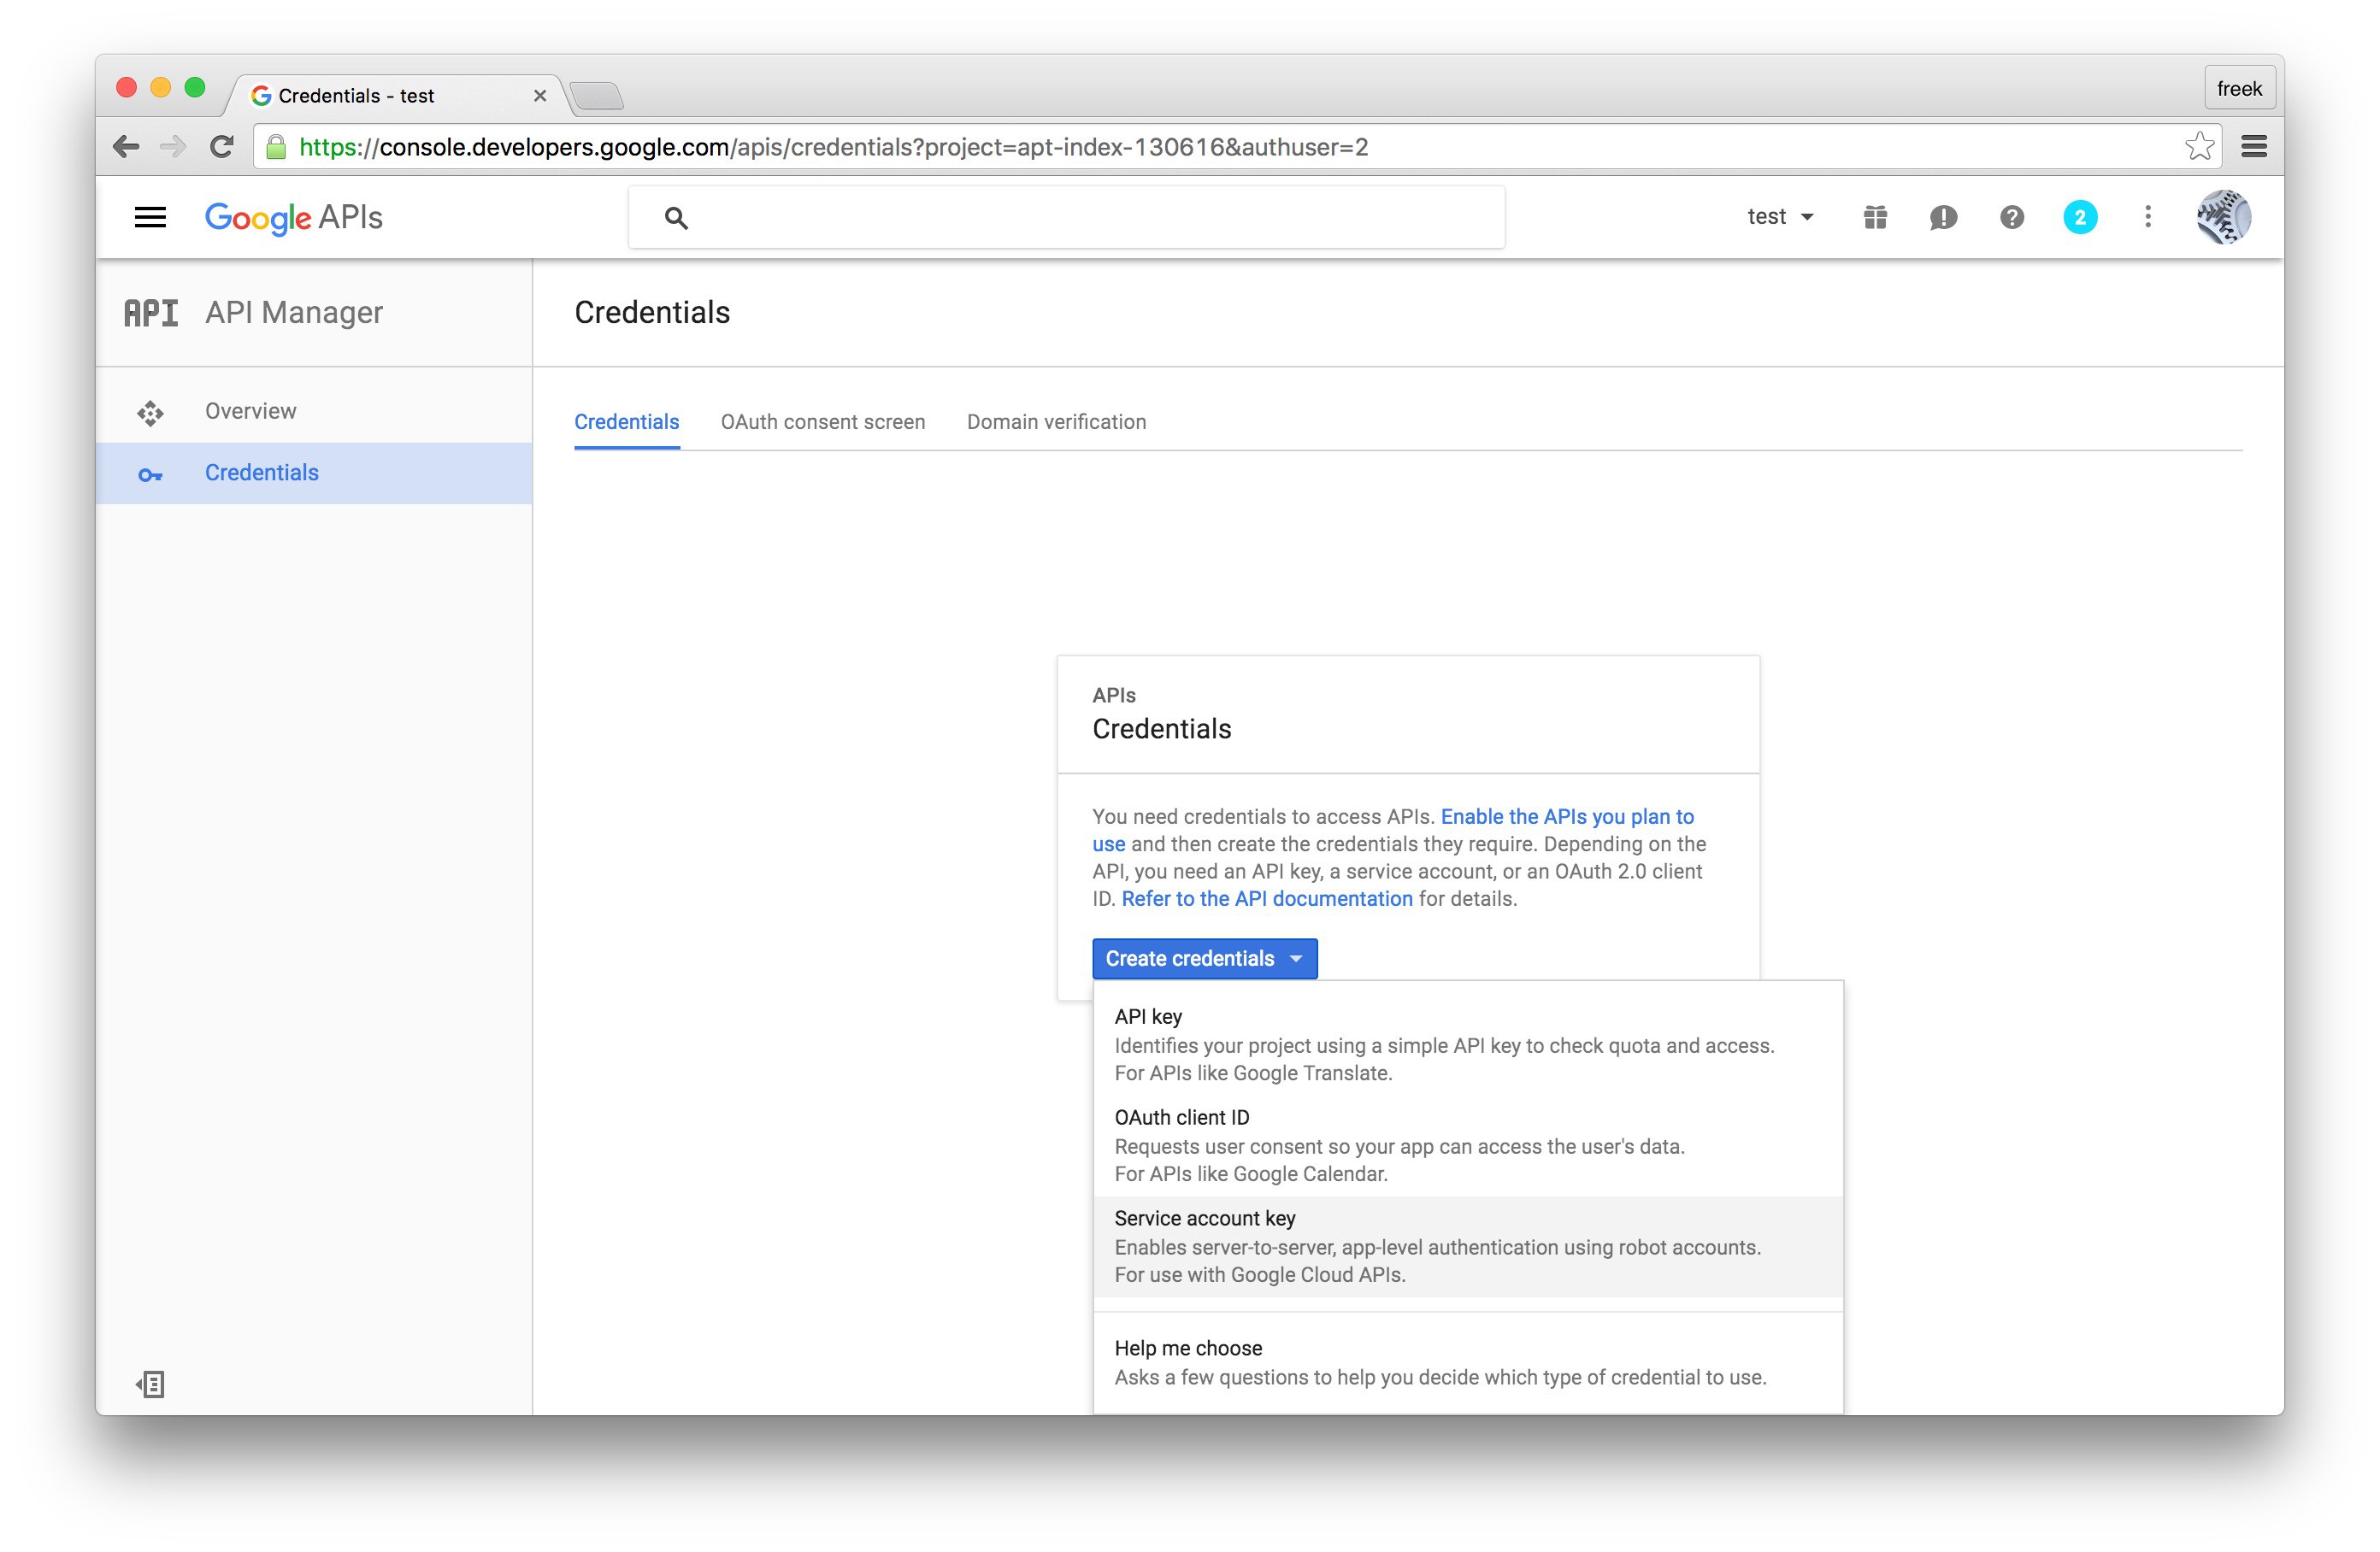
Now that you’ve created a project that has access to the Analytics API it’s time to download a file with these credentials. Click “Credentials” in the sidebar. You’ll want to create a “Service account key”.
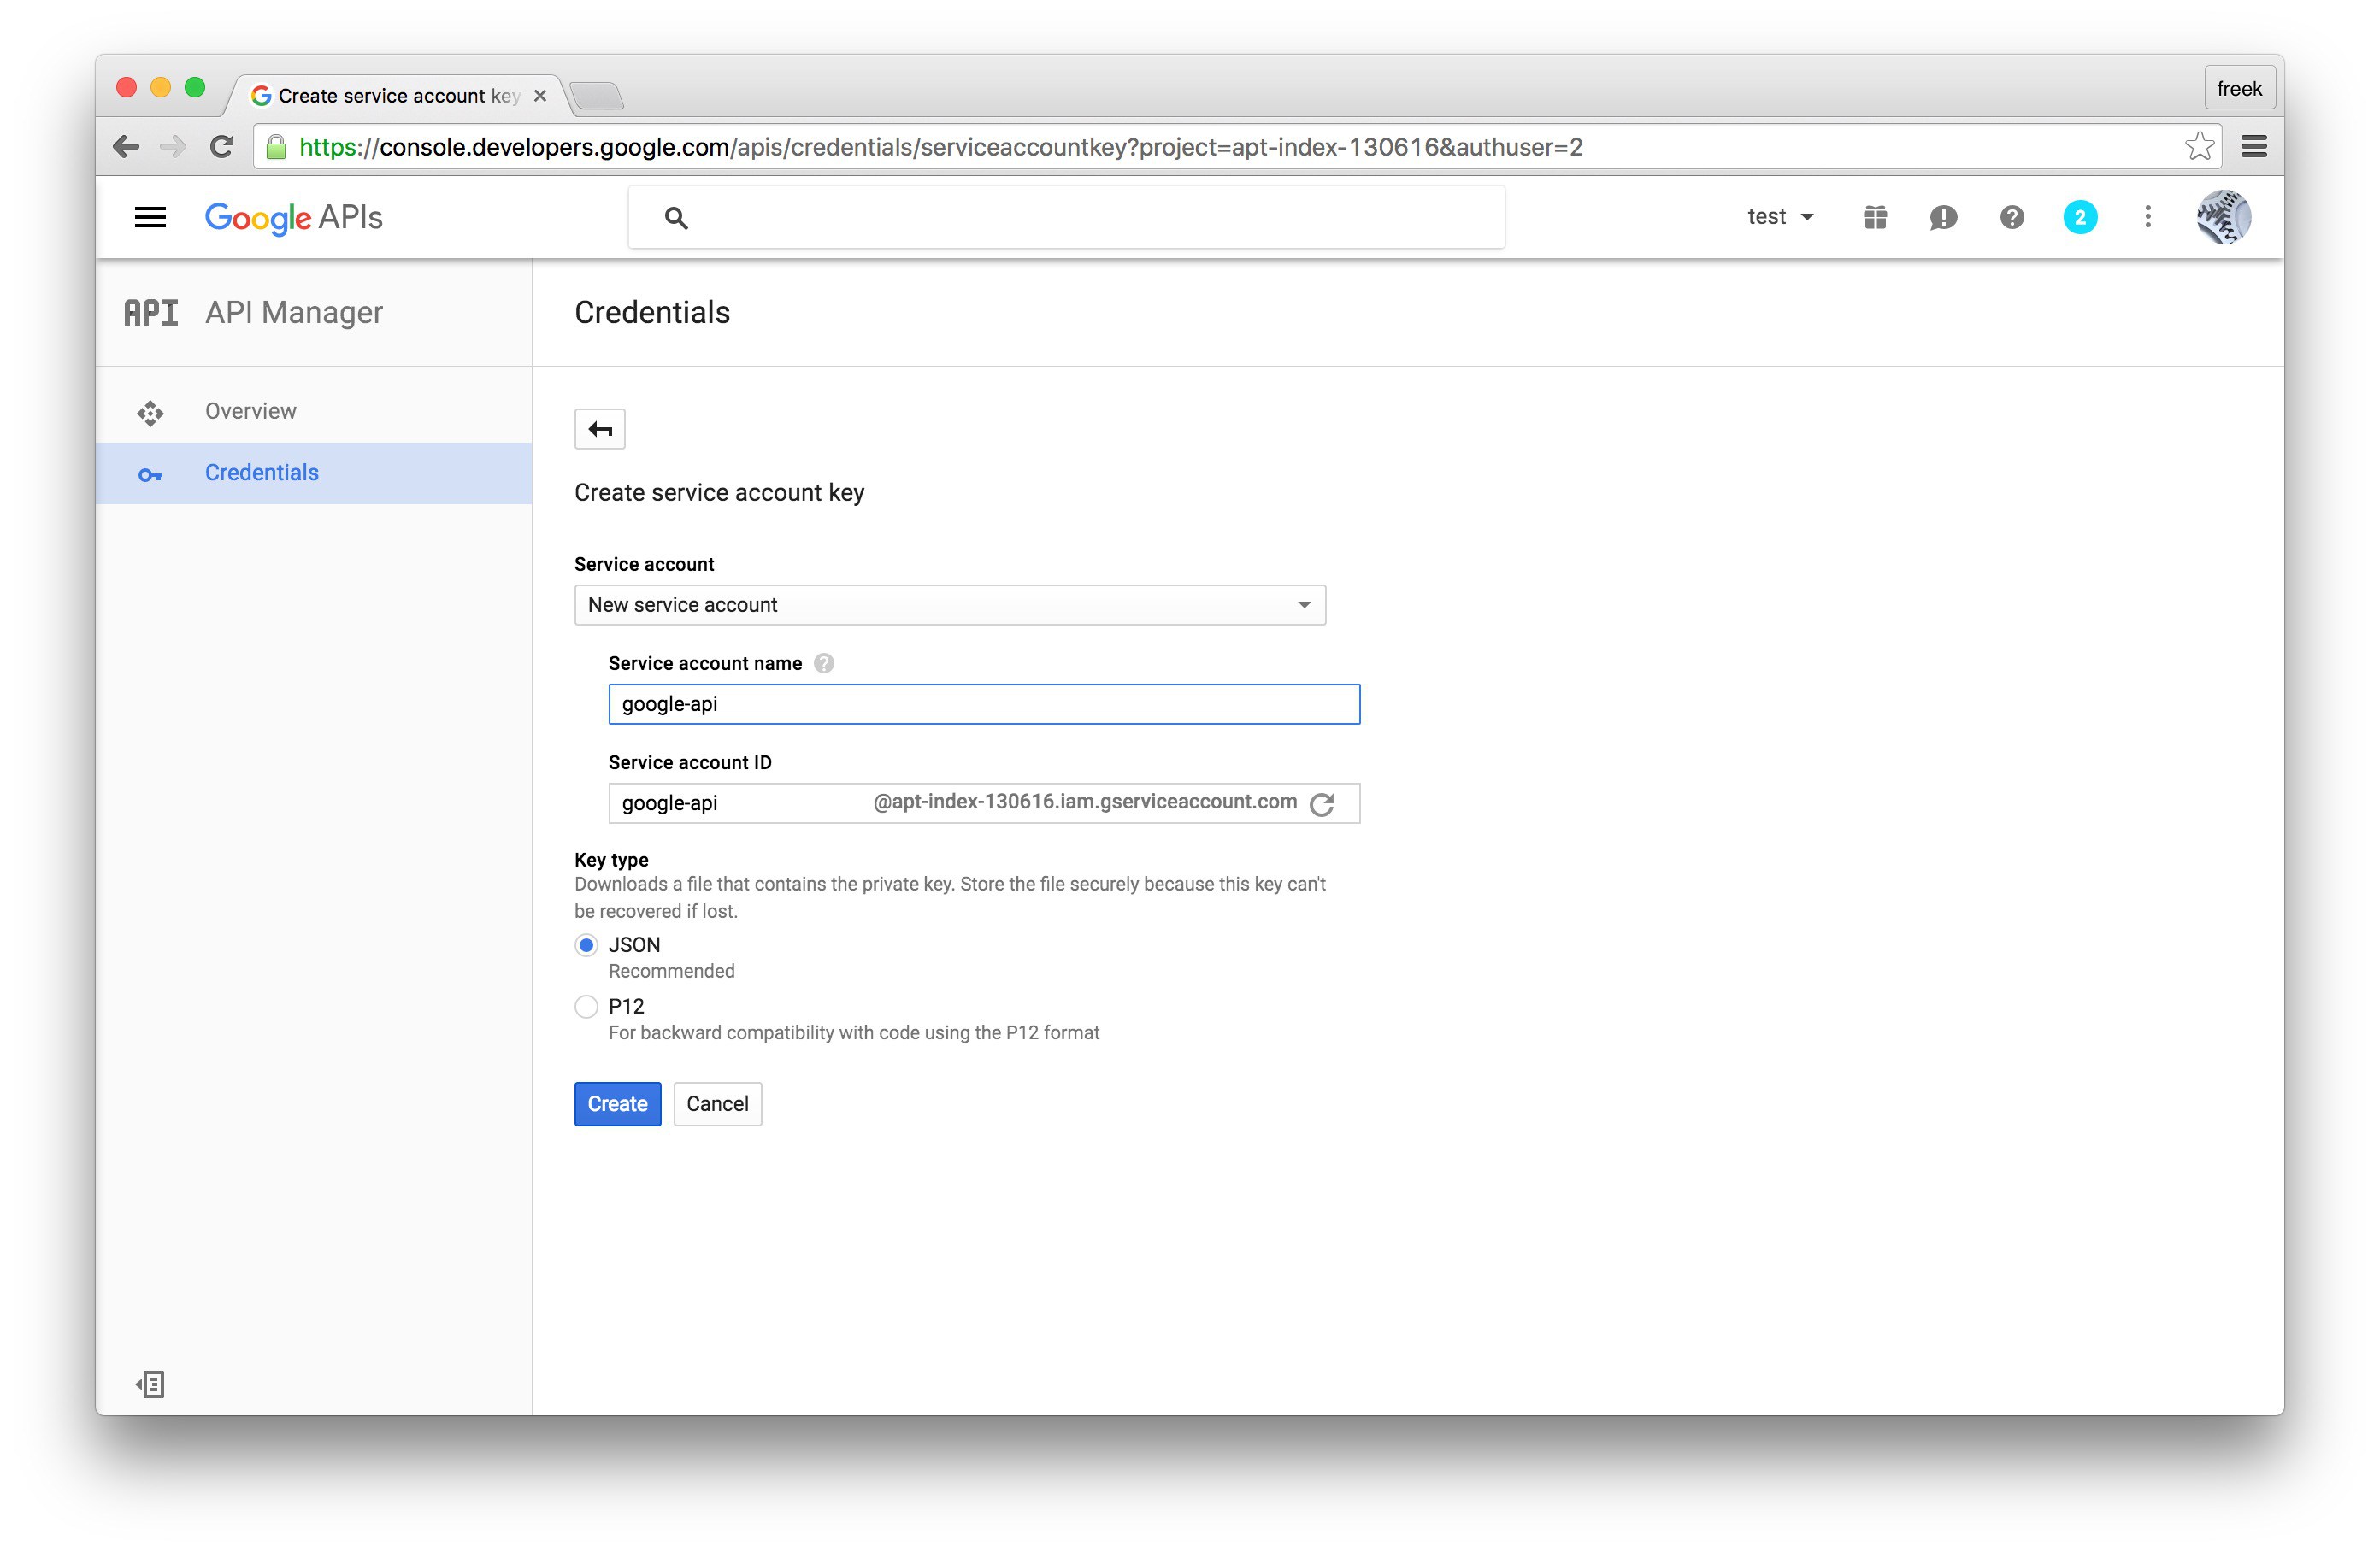
On the next screen you can give the service account a name. You can name it anything you’d like. In the service account id you’ll see an email address. We’ll use this email address later on in this guide. Select “JSON” as the key type and click “Create” to download the JSON file.
Save the json inside your Laravel project at the location specified in the service_account_credentials.json key (default is storage\app\analytics) of the config file of this package. Because the json file contains potentially sensitive information I don’t recommend committing it to your git repository.
Granting permissions to your Analytics property
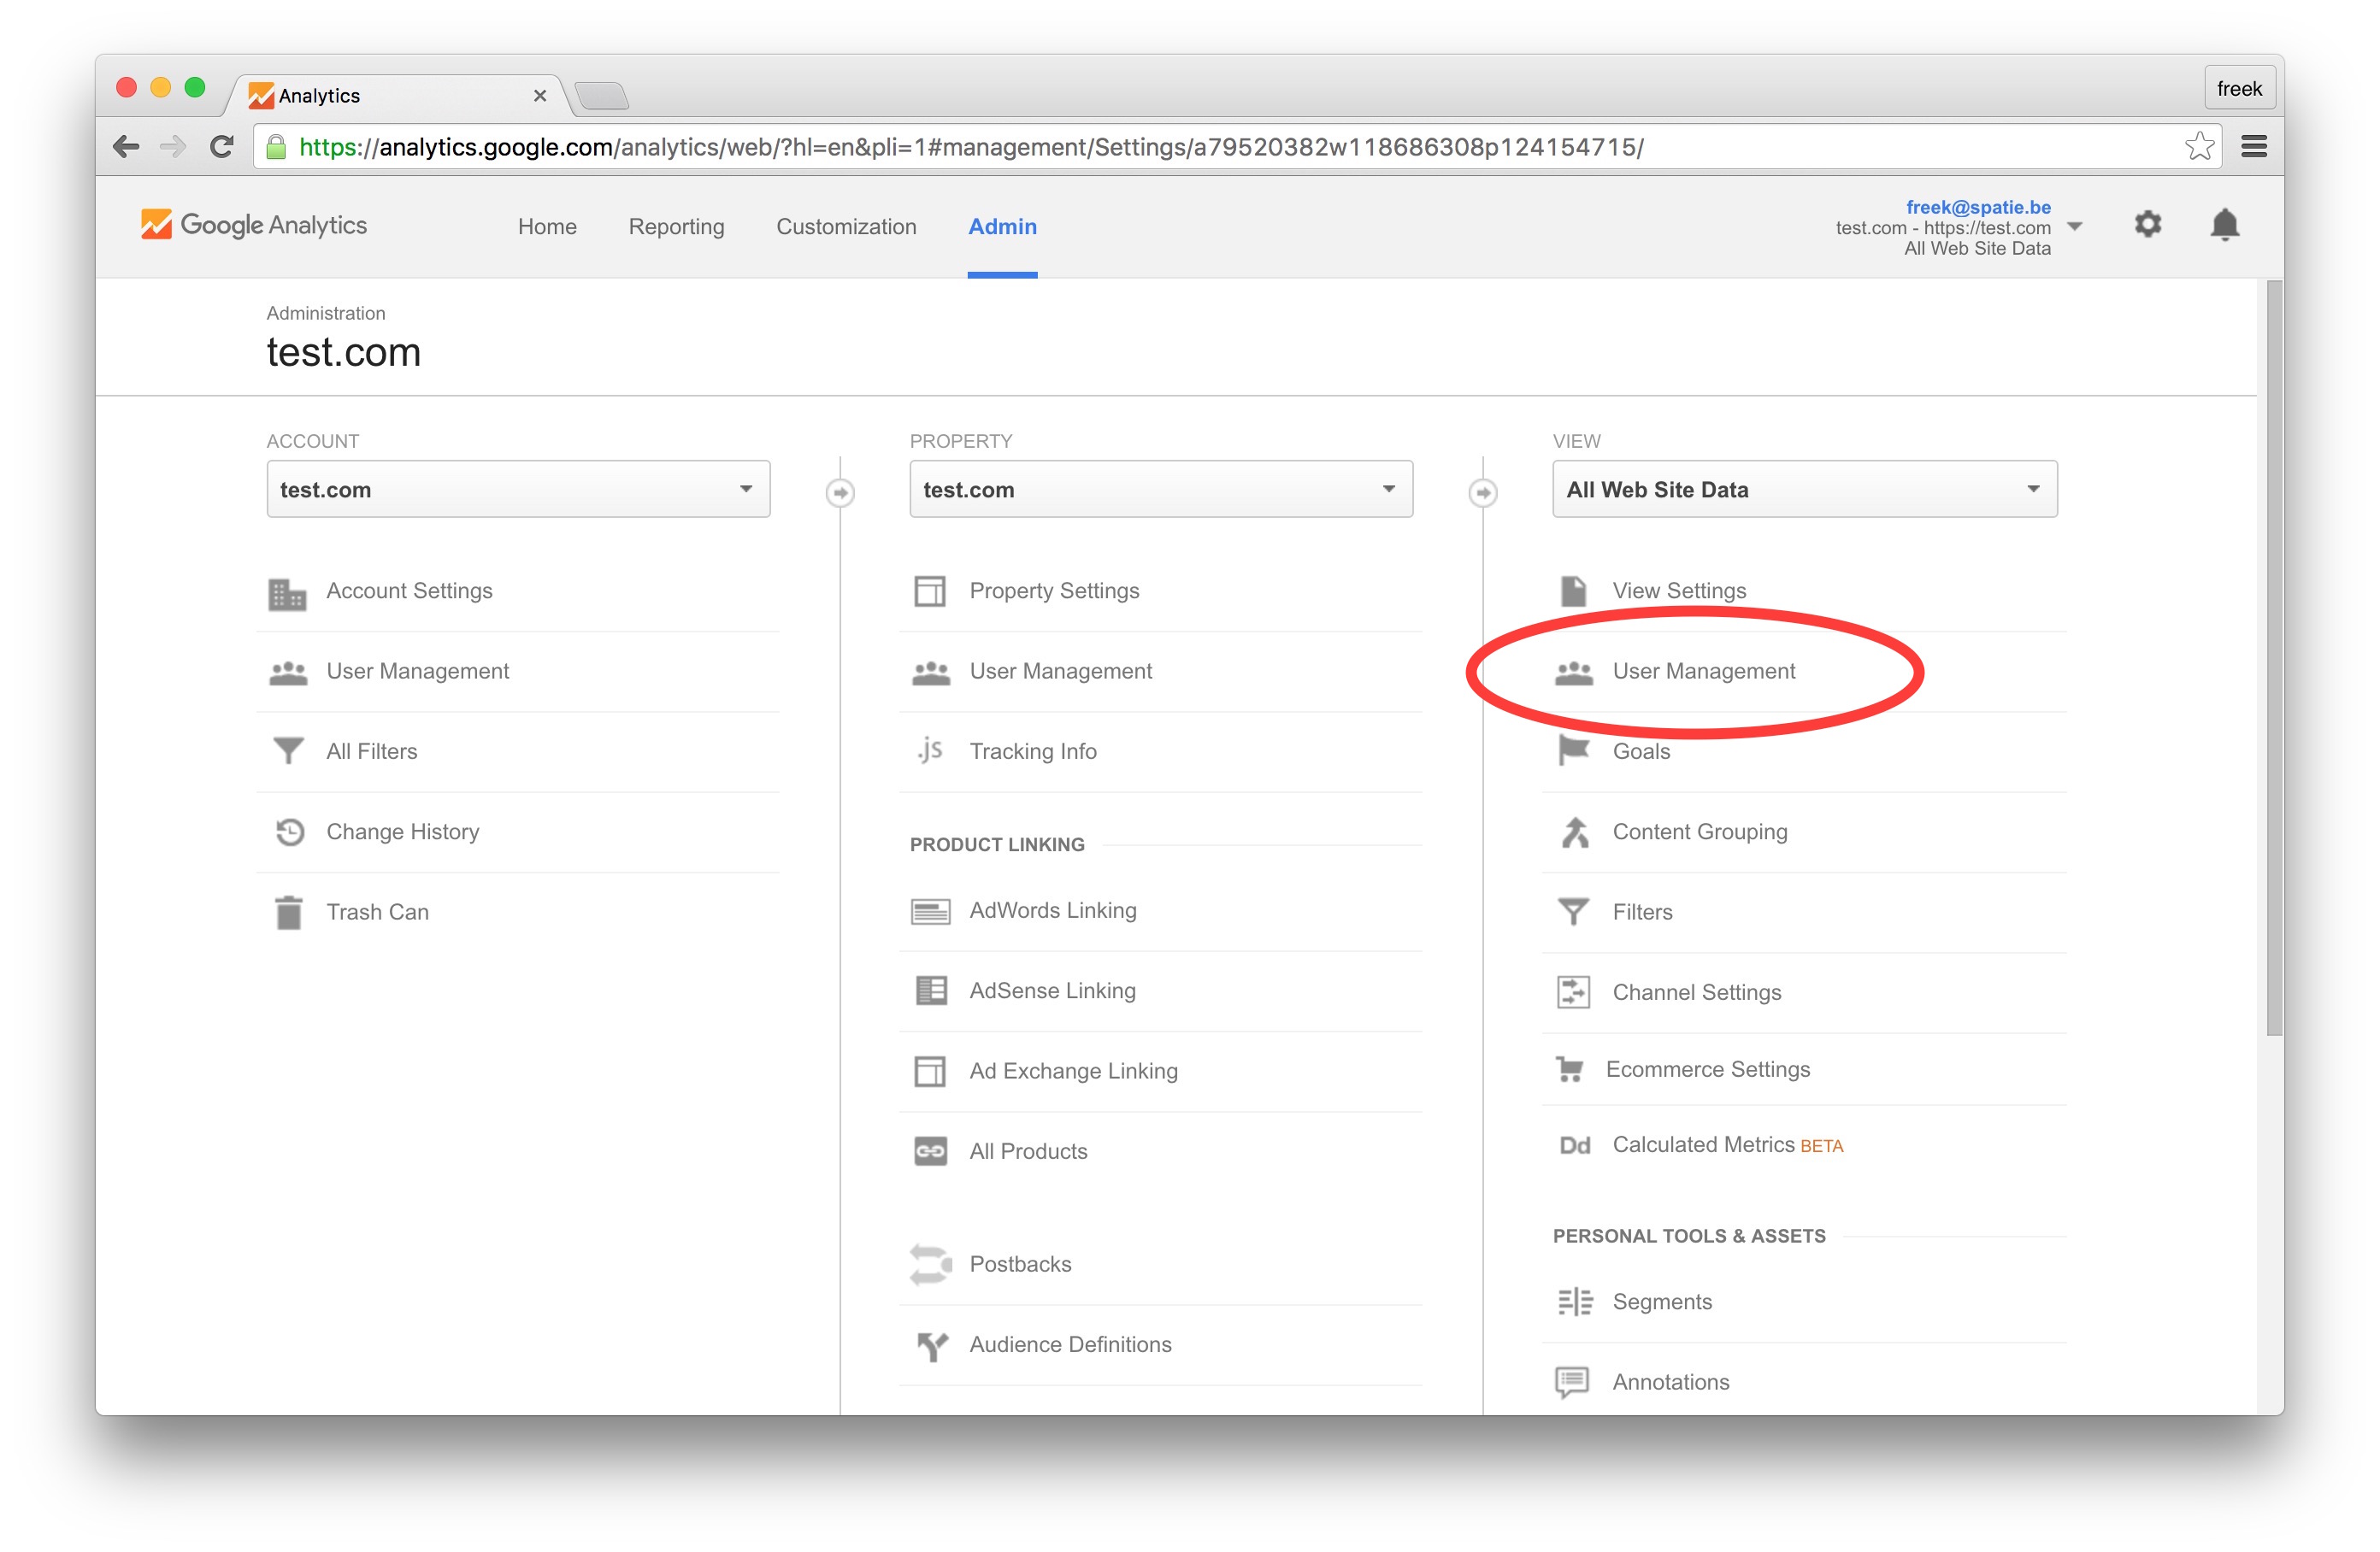
I’m assuming that you’ve already created a Analytics account on the Analytics site. Go to “User management” in the Admin-section of the property.
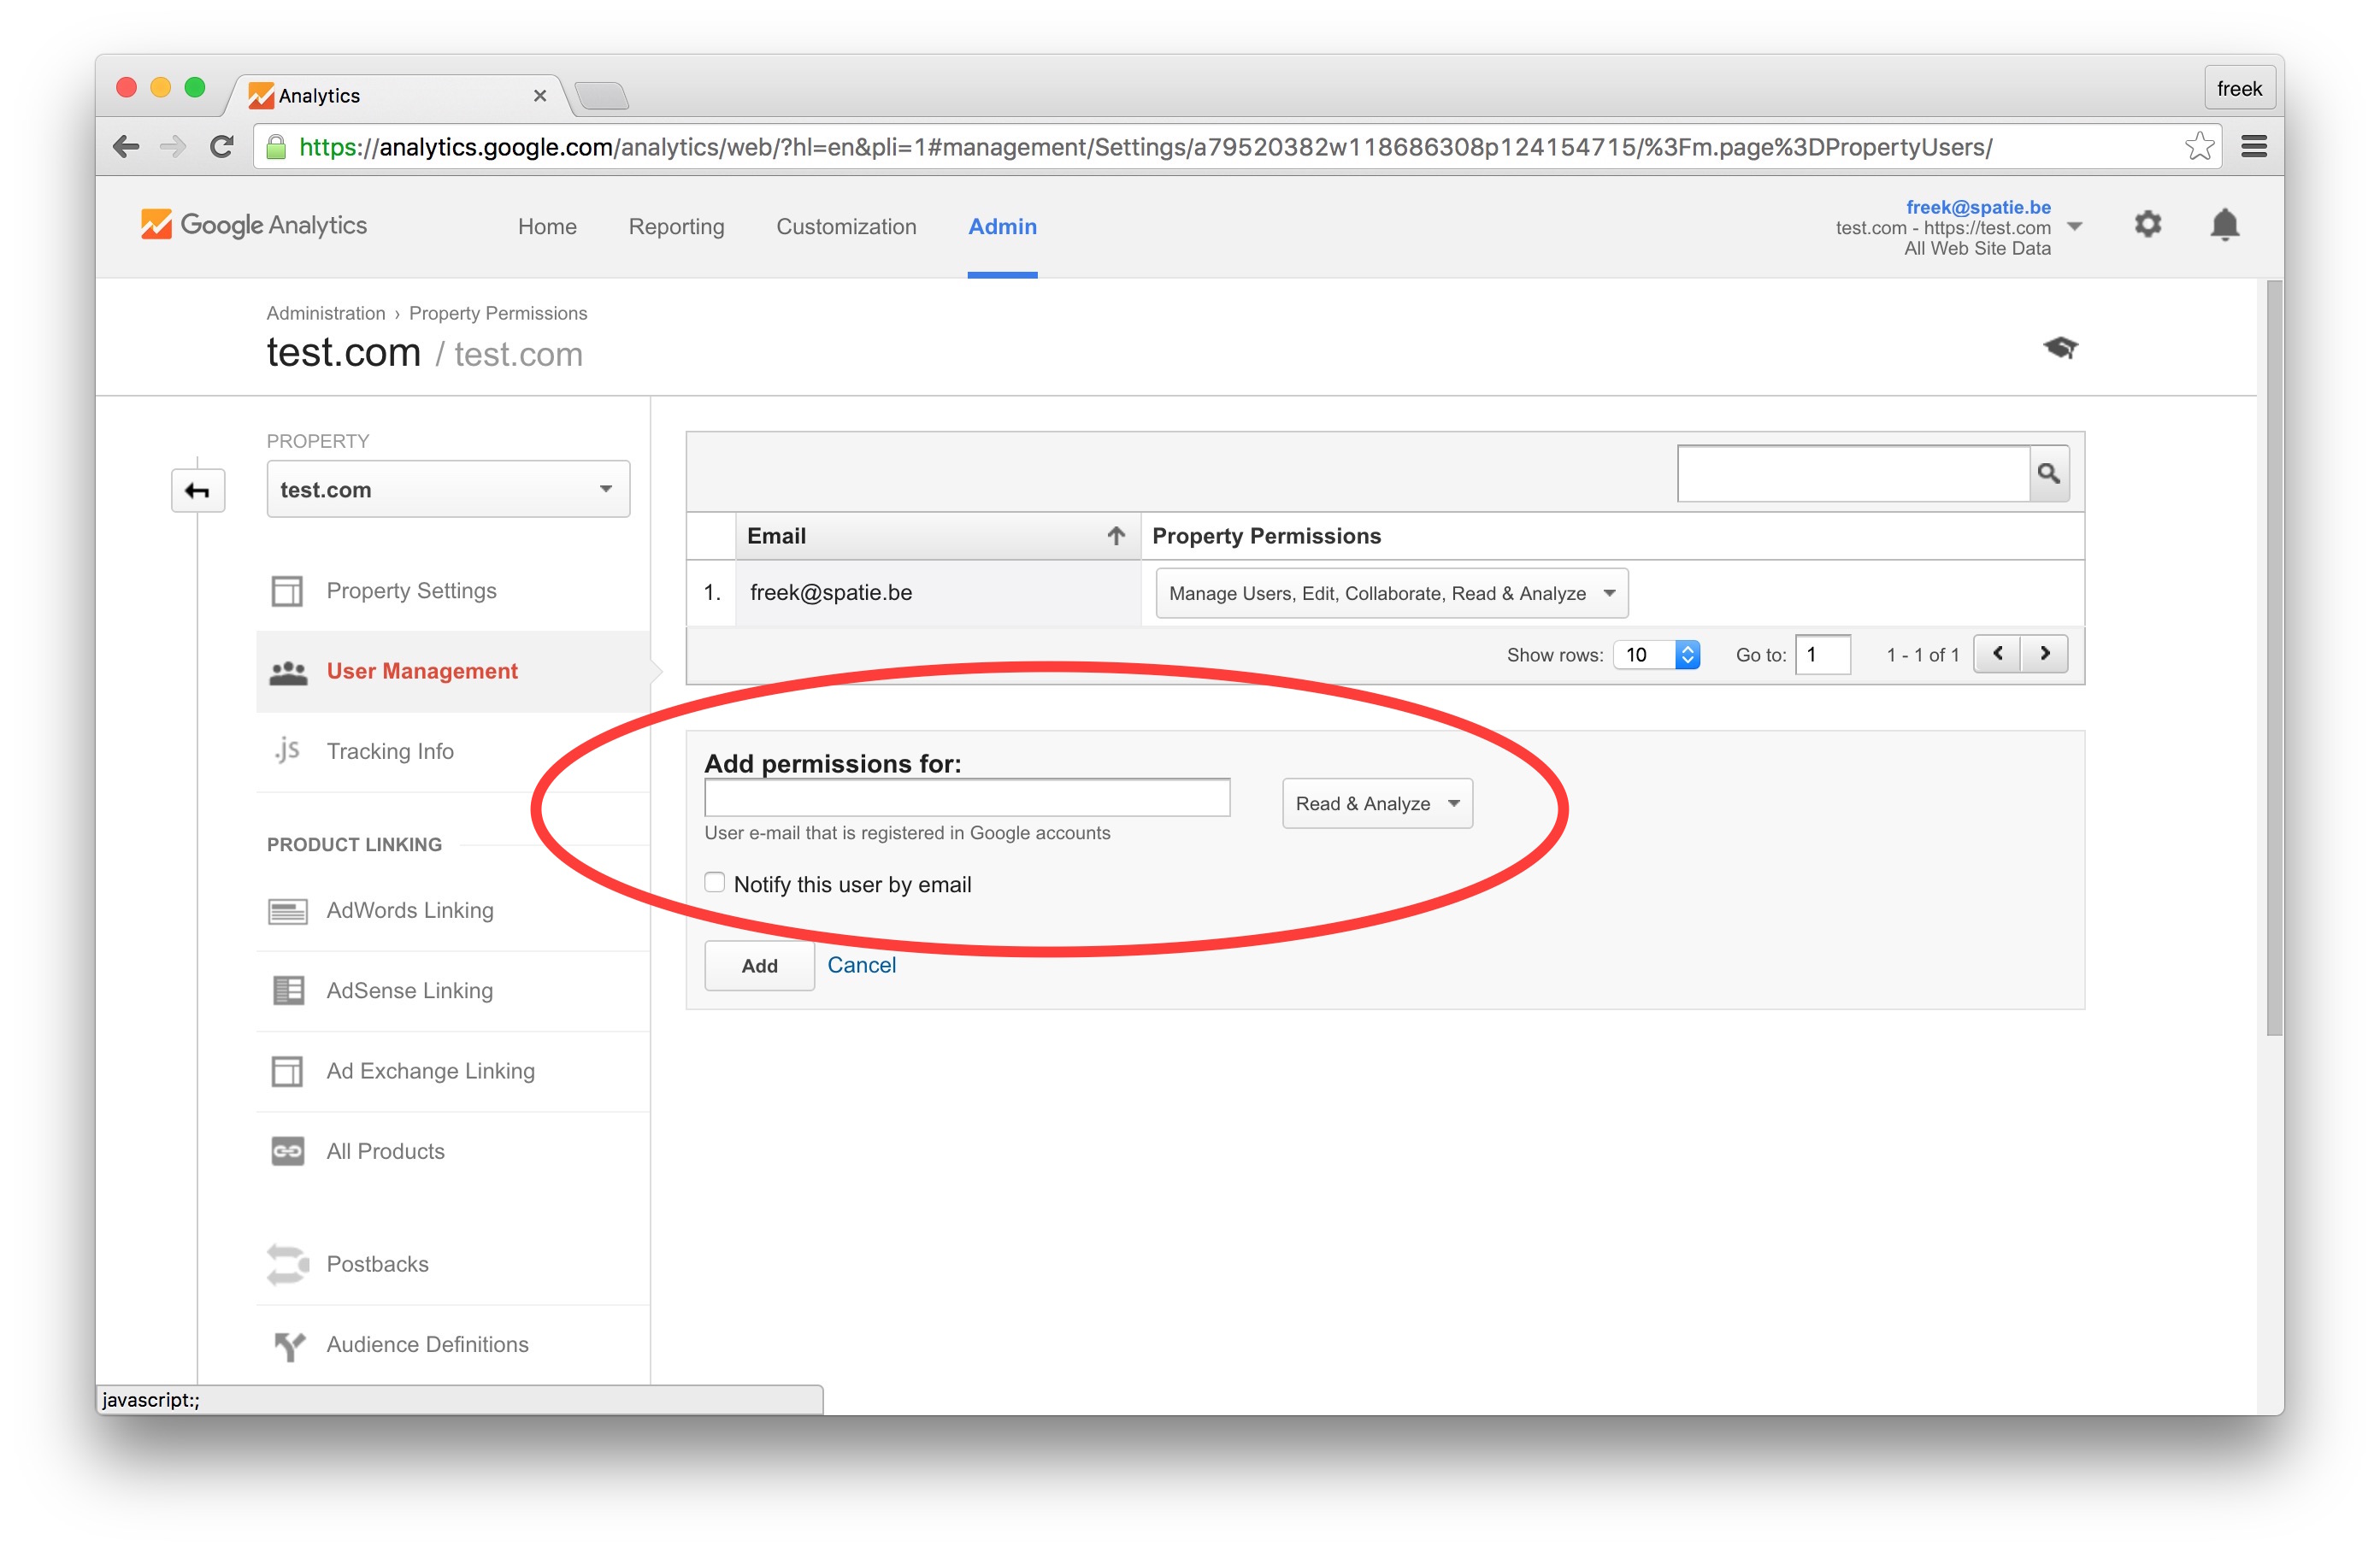
On this screen you can grant access to the email address found in the client_email key from the json file you download in the previous step. Read only access is enough.
Getting the view id
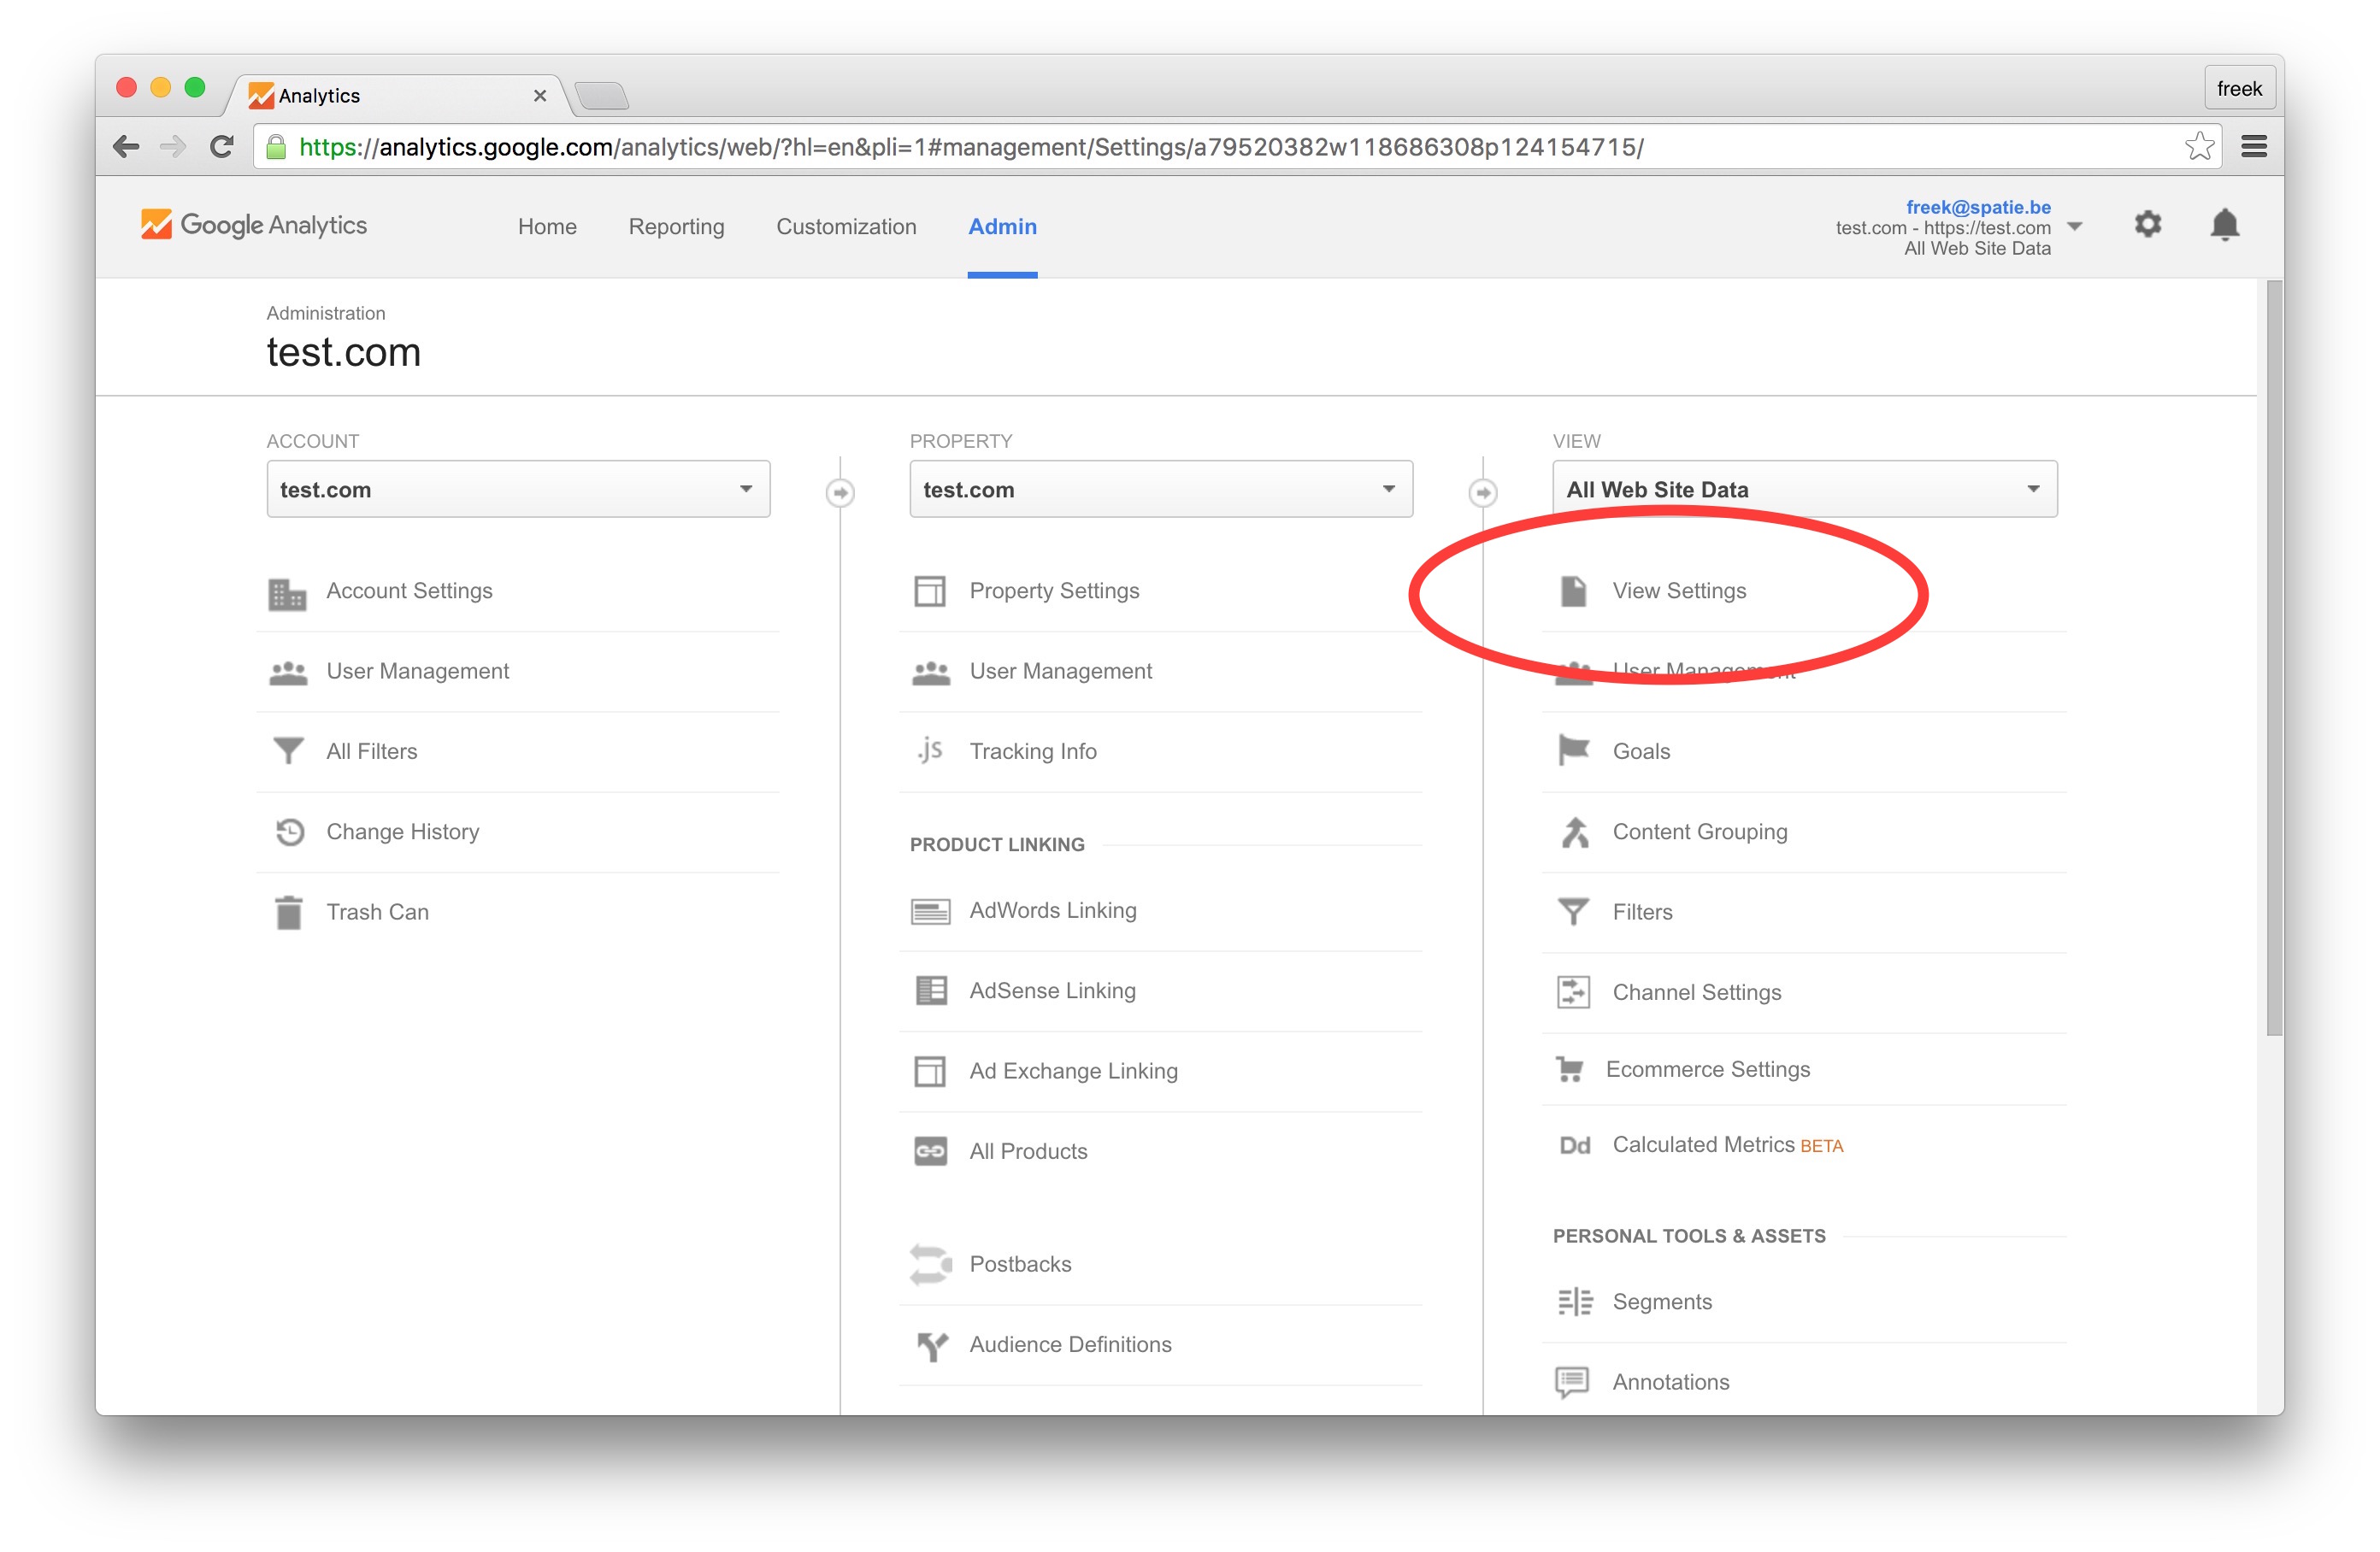
The last thing you’ll have to do is fill in the view_id in the config file. You can get the right value on the Analytics site. Go to “View setting” in the Admin-section of the property.
You’ll need the View ID displayed there.
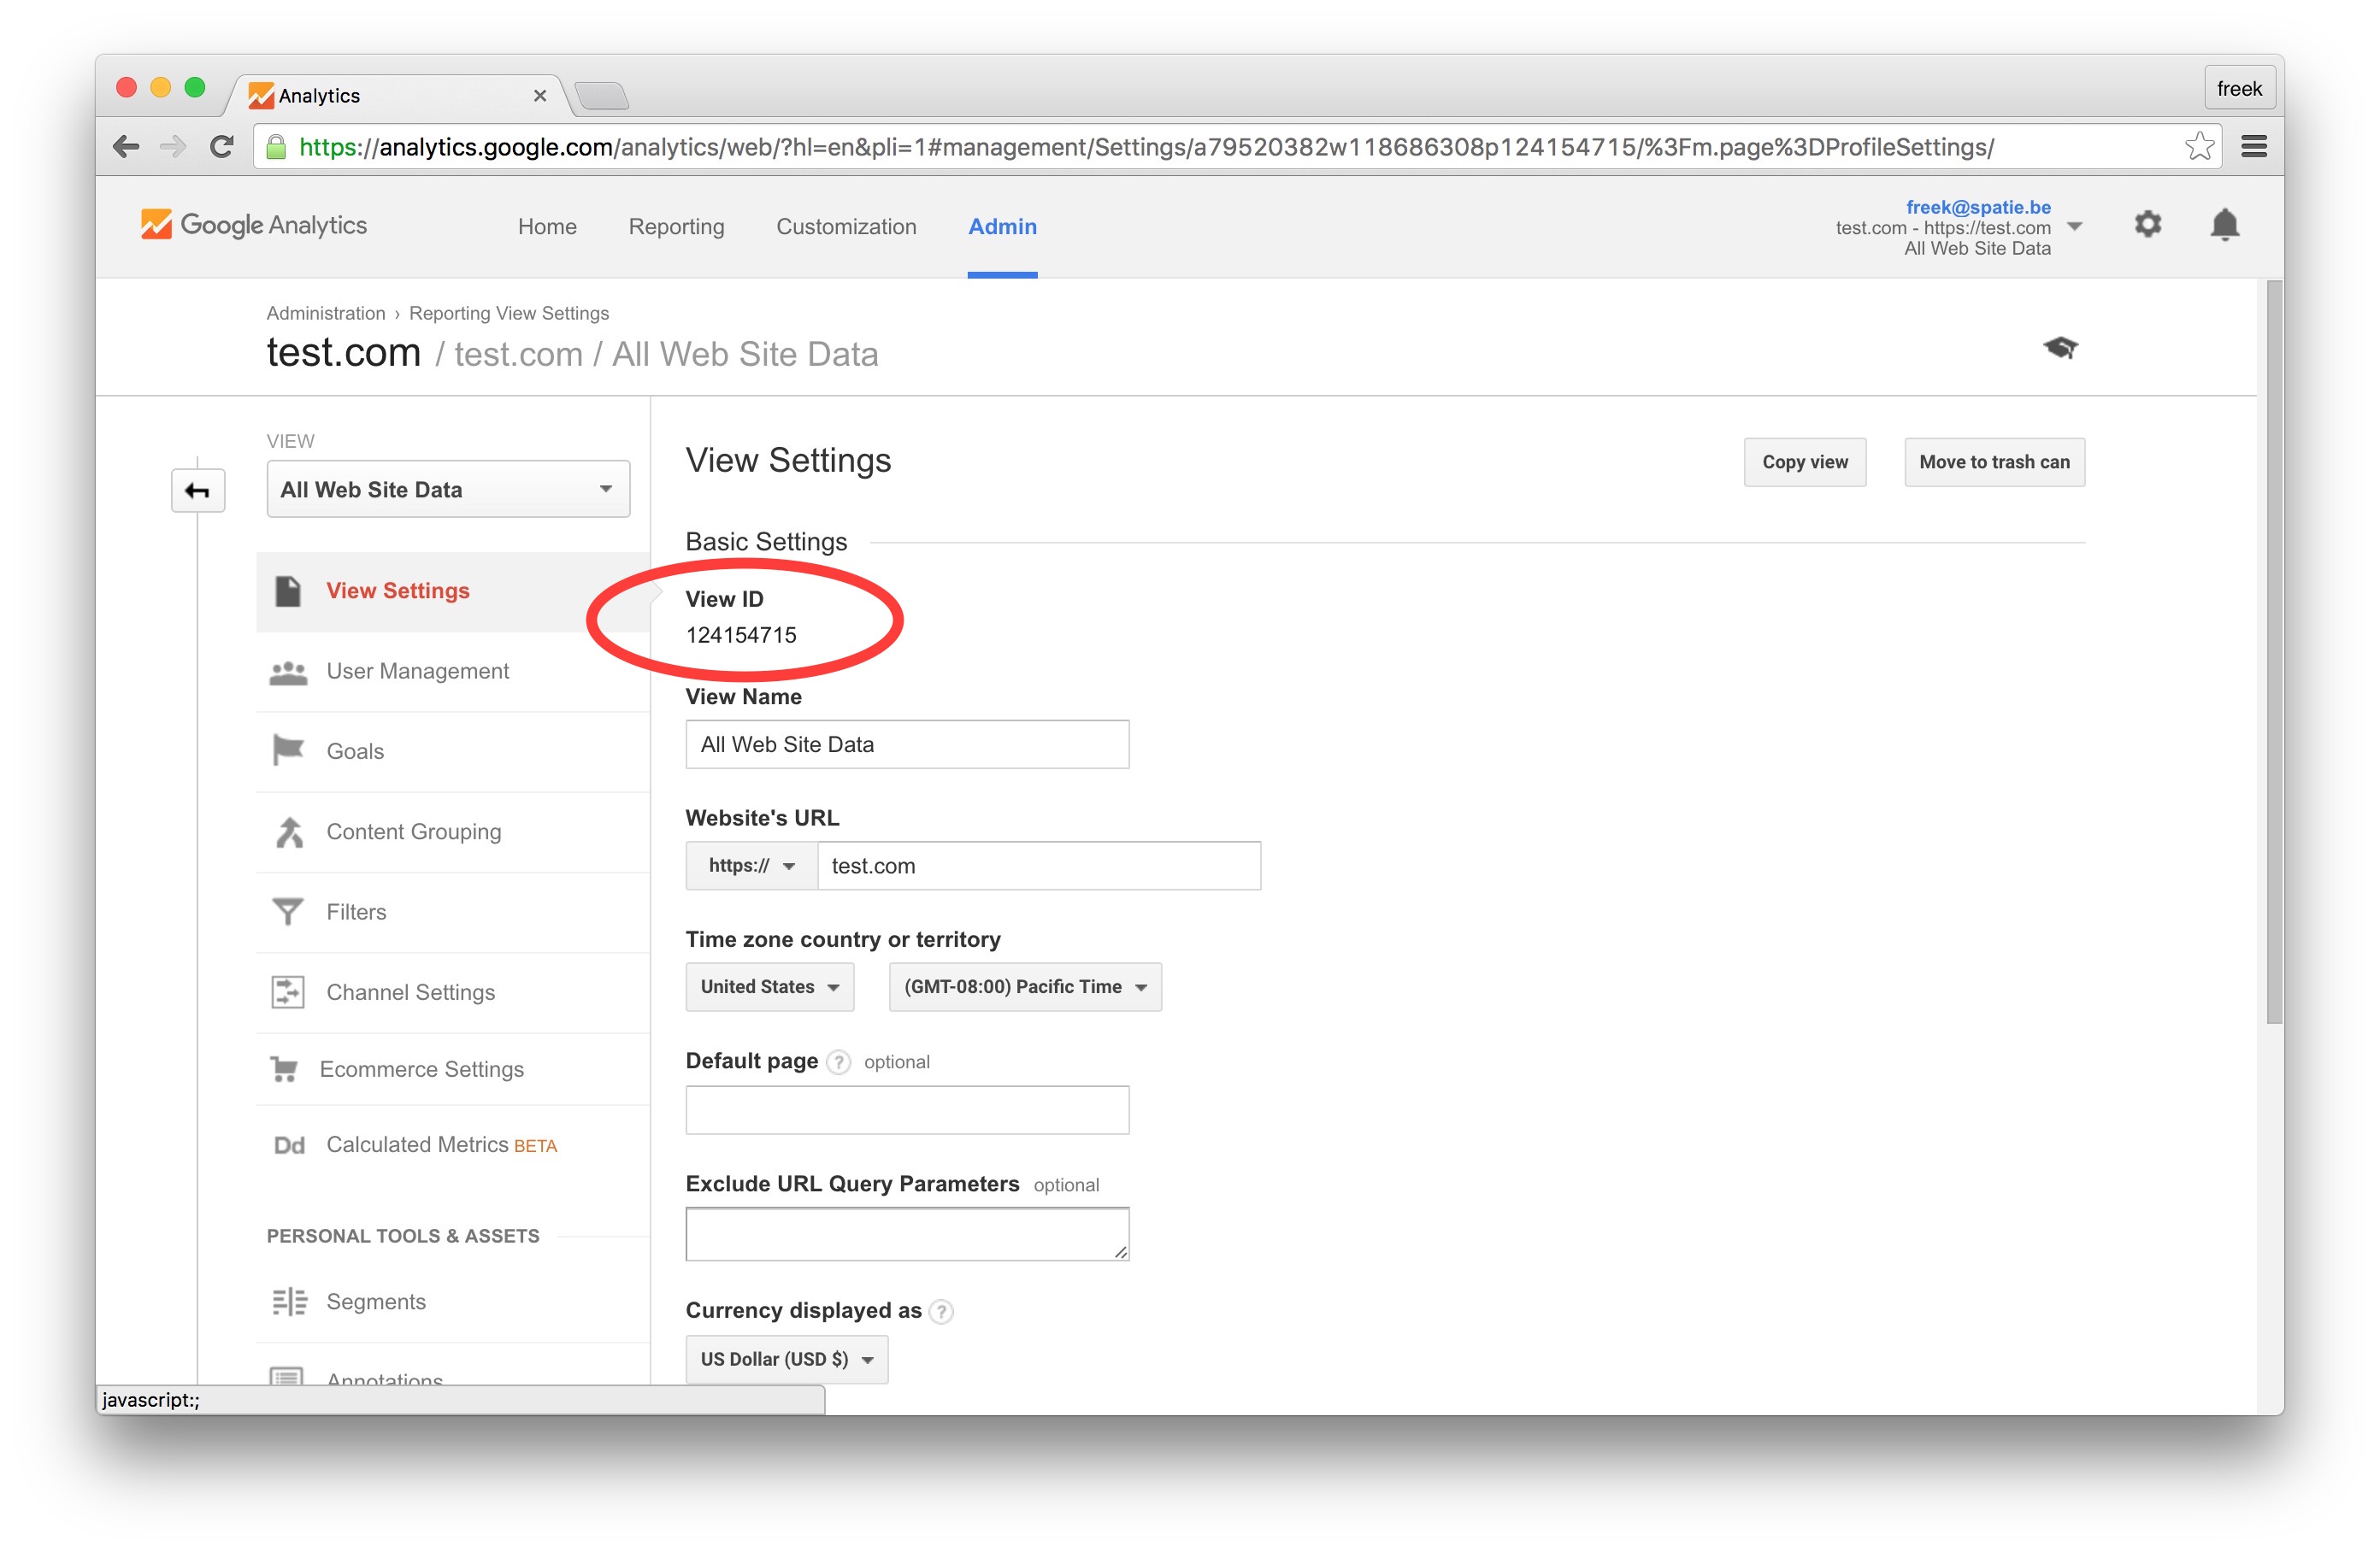
- Replace ANALYTICS_VIEW_ID values inside your .env with the view Id from the screen above